Removing old window films might seem like a straightforward task, but there are several factors to consider before diving in. Whether you’re an interior designer aiming to refresh a client’s space, or a homeowner looking to update your home’s aesthetics, understanding the nuances of window tint removal can save time, money, and potential headaches.
In this article, we’ll walk you through everything you need to know about removing old window films, ensuring that you make informed decisions that align with your design goals and energy efficiency needs.
Removing window tint isn’t just about peeling off the film. It’s about maintaining the integrity of the glass underneath and ensuring that the removal process doesn’t leave behind any unsightly residue or damage.
Why Remove Old Window Films?
Old window films may degrade over time due to exposure to sunlight and other environmental factors, leading to peeling, bubbling, or discoloration. These issues not only detract from the visual appeal of your windows but can also impair the film’s original function, such as UV protection and heat reduction. Removing and replacing them can rejuvenate the look of your windows and restore their functional benefits.
Tools and Materials Needed
Before you start, gather the necessary tools:
- A razor blade or utility knife
- Spray bottle filled with soap and water solution
- Window cleaner
- Scraper or squeegee
- Microfiber cloths
Having the right tools on hand will make the process smoother and more efficient.
Step-by-Step Guide to Removing Window Tint
Step 1: Preparation
Begin by cleaning the window surface with a standard glass cleaner to remove any dirt or debris. This will make the removal process more manageable and prevent scratches on the glass.
Step 2: Loosen the Film
Spray the window tint with a generous amount of soapy water. Allow it to soak for a few minutes. This will help loosen the adhesive, making the film easier to peel off.
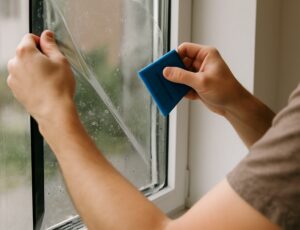
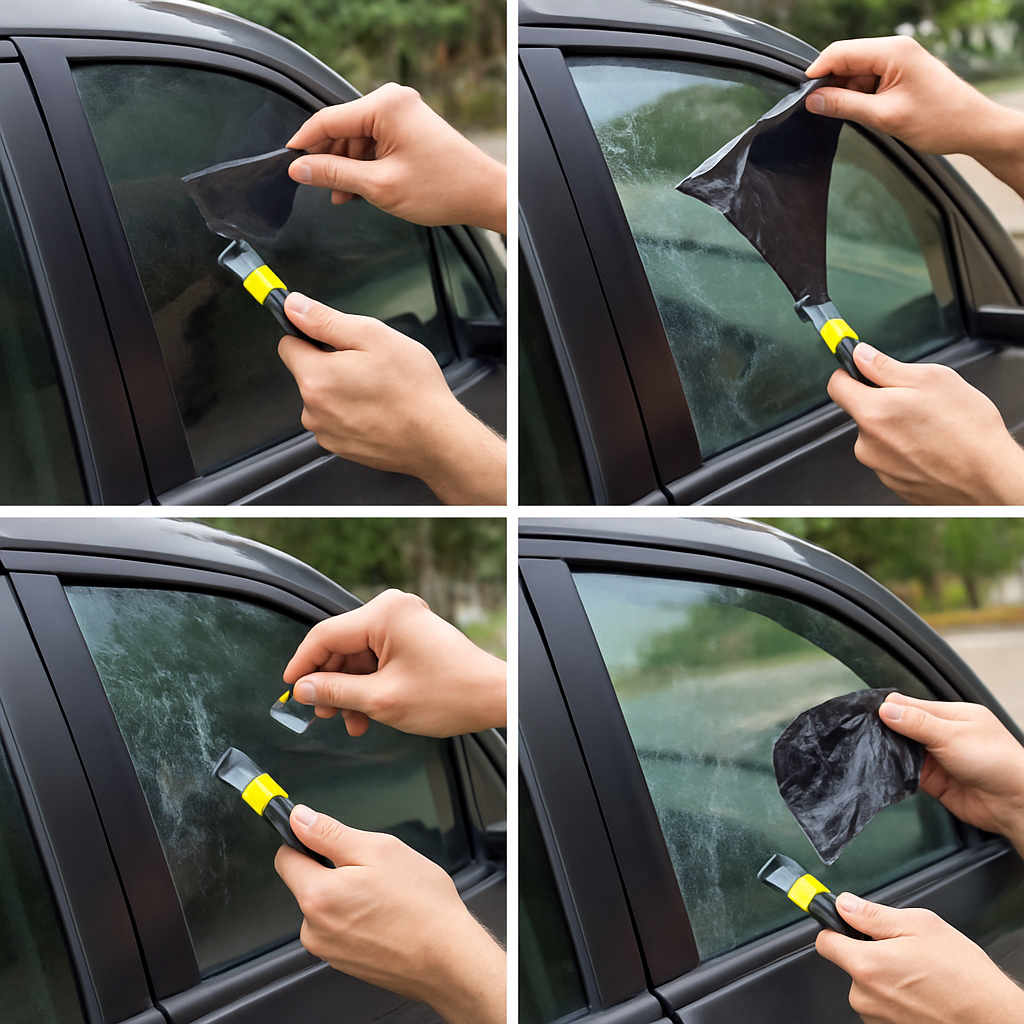
Step 3: Peeling Off the Film
Starting from one corner, use the razor blade or utility knife to gently lift the edge of the film. Slowly peel the film away from the glass. If the film tears, don’t worry—just continue peeling from another edge.
Step 4: Removing Residue
Once the film is removed, there may be adhesive residue left on the glass. Spray the soapy water solution and use the scraper or squeegee to remove any remaining adhesive. Wipe the surface clean with a microfiber cloth.
Step 5: Final Clean
Finish by cleaning the window with glass cleaner to remove any streaks or leftover residue.
Potential Challenges and Solutions
Window tint removal can come with its set of challenges. Here are some common issues and how to address them:
Stubborn Adhesive
If the adhesive is particularly stubborn, consider using a commercial adhesive remover. Apply it to the residue, let it sit for a few minutes, and then scrape it off.
Damaged Glass
Take care when using sharp tools to avoid scratching or damaging the glass. If you notice any damage, it may be worth consulting a professional.
Heat and Sunlight
The removal process can be more difficult in cold weather. If possible, work on a warm day or use a heat gun to slightly warm the window, which can help loosen the adhesive.
Eco-Friendly Considerations

by John Cardamone (https://unsplash.com/@john_cardamone)
As an interior designer, providing eco-friendly solutions is often a priority. When removing old window films, consider the environmental impact of your materials and methods:
- Opt for biodegradable soap solutions.
- Dispose of old films responsibly—check if local recycling centers accept them.
- When replacing films, look for eco-friendly products that offer UV protection and energy savings, such as those recommended by the U.S. Department of Energy.
When to Call a Professional
While DIY window tint removal is feasible, there are situations where hiring a professional might be the best course of action:
- Large commercial spaces or difficult-to-reach windows
- Highly damaged or stubborn films
- Concerns about glass integrity or existing window treatments
Professionals have specialized tools and expertise to handle complex jobs efficiently.
Selecting New Window Films
Once the old films are removed, you may want to install new ones. Here are some factors to consider when selecting replacements:
- Aesthetic Appeal: Choose films that complement the interior design.
- Energy Efficiency: Consider films that reduce heat gain and improve insulation.
- UV Protection: Protect furnishings and occupants from harmful UV rays.
- Privacy: Select films that provide the desired level of privacy.
Conclusion
Removing old window films requires careful planning and execution, but with the right approach, it can significantly enhance the appearance and function of your windows. Whether you’re working on a client project or updating your own space, understanding the process will help you achieve the best results.
By taking a methodical approach to window tint removal and replacement, you can ensure that your windows not only look great but also contribute to a more comfortable and energy-efficient environment. With these insights, you’re well-equipped to tackle your window film projects with confidence.