If you’re looking to refresh the look of your windows or want to update your window films, knowing how to safely peel off window tinting can be incredibly useful. Window tint can degrade over time, becoming less effective and attractive. Luckily, removing it is a straightforward task that you can do yourself with some simple techniques. This guide will walk you through safe and efficient methods for removing window tinting.
Window tinting involves applying a thin laminate film to the interior or exterior of glass surfaces in automobiles, homes, and buildings. The film is known for reducing heat and glare, increasing privacy, and improving energy efficiency. According to the U.S. Department of Energy, window films and coverings can significantly improve insulation and help lower energy costs.
However, over time, the tint can fade, bubble, or peel, which not only looks unsightly but can also reduce its effectiveness. Let’s explore why you might need to remove window tint and how to do it without damaging your windows.
Window tints can lose their visual appeal due to prolonged exposure to sunlight, leading to fading, bubbling, or peeling. When this happens, it’s time to remove the tint and apply a new one to maintain the aesthetic and functional benefits.
If your window tint isn’t providing the heat reduction or UV protection it once did, it may need replacing. Tints can lose their efficiency over time, and removing the old film is the first step in updating to a more effective solution. The U.S. Environmental Protection Agency notes that UV exposure can degrade materials over time, which is one reason older films lose performance.
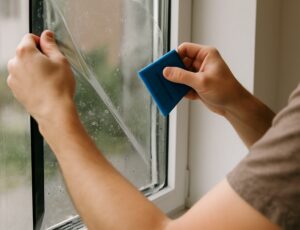
!Person removing tint from window()
Sometimes, a change in personal preference or a remodeling project might necessitate the removal of window tint. Whether you’re going for a different style or no tint at all, removing the existing film is essential.
Removing window tint doesn’t have to be a daunting task. Here are some safe and effective DIY techniques for removing window film at home.
This method is simple and requires materials you likely already have at home.
- Dish soap
- Water
- Spray bottle
- Razor blade or utility knife
- Soft cloth or paper towels
- Mix Solution: Fill the spray bottle with a mixture of dish soap and water.
- Soak the Tint: Spray the soapy water generously onto the window tint. Let it sit for a few minutes to loosen the adhesive.
- Peel the Tint: Starting at one corner, use the razor blade or utility knife to lift the tint gently. Pull the tint slowly to avoid tearing.
- Remove Residue: Spray more soapy water and use the razor blade to scrape off any leftover adhesive. Wipe clean with a soft cloth.
This method uses steam to soften the adhesive, making it easier to remove the tint.
- Clothes steamer
- Razor blade or utility knife
- Soft cloth
- Heat the Tint: Hold the steamer about a few inches away from the window, slowly moving it across the surface to heat the tint.
- Peel the Tint: Once the tint is warm, use the razor blade to lift a corner and gently peel it off.
- Clean the Glass: Use the steamer to soften any remaining adhesive, then wipe it away with a cloth.
For stubborn tint, ammonia can be an effective solution.
- Ammonia
- Black trash bags
- Razor blade
- Spray bottle
- Protective gloves
- Prepare the Area: Cover any surfaces below the window to protect them from ammonia.
- Apply Ammonia: Fill a spray bottle with ammonia and spray it onto the inside of the window.
- Cover with Plastic: Immediately cover the window with a black trash bag to trap the ammonia and heat from the sun.
- Let Sit: Leave for about an hour, allowing the ammonia to soften the adhesive.
- Remove Tint: Peel off the tint with a razor blade and clean any residue.
When removing window tint, it’s important to keep safety in mind:
- Use caution with sharp tools like razor blades to prevent injury.
- Ensure adequate ventilation when using ammonia or other chemicals.
- Protect your eyes and hands with goggles and gloves.
Once you’ve successfully removed the window tint, it’s essential to clean the window thoroughly. Use a glass cleaner to remove any streaks and ensure the surface is ready for a new tint if you choose to apply one. Regular cleaning will help maintain the glass’s clarity and keep it looking its best.
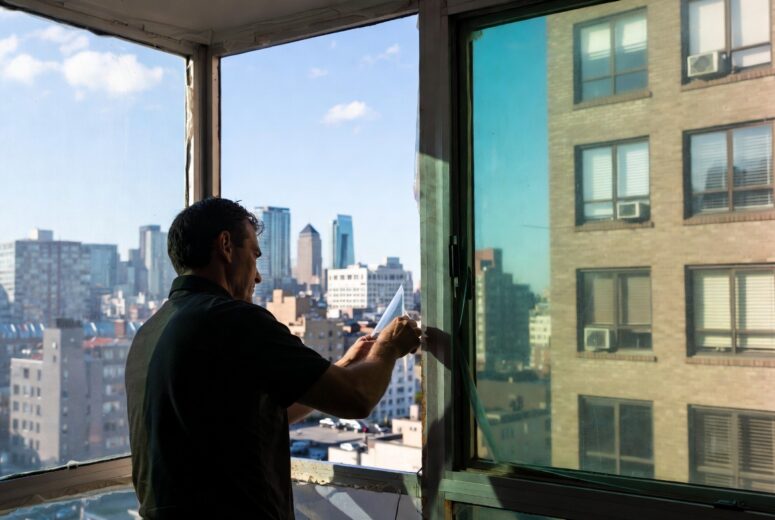
!Clean window after tint removal()
Removing window tint can be a straightforward DIY project if you follow these safe and effective techniques. Whether you’re dealing with faded tint, reducing functionality, or just changing aesthetics, these methods will help you achieve a clean and fresh start for your windows. Remember, patience and care are key to avoiding damage and ensuring a smooth removal process. With these tips, you can confidently update your window films to meet your current needs and preferences.